
Dive deeper into your audio workflow - annotate all aspects of your audio files, plot changes and plan critical decisions before ever opening a DAW.
Documentation & User Guide
This guide covers every feature of WavePlan, whether you’re running it standalone or as part of the upcoming suite.
Introduction
What Is Waveplan?
To answer that, let me ask you: have you ever wished you could write notes directly on your analyzer? What about your meter, or even scribble on a track or timeline?
Whether you plan to analyze, take notes, or map edits, WavePlan gives you a streamlined workspace built for mixing, mastering, and creative planning — right where real decisions happen.
-
A pre-DAW Studio You Can Take Anywhere
Reference-check a master on the train. Annotate a mix revision from your couch. Compare stems at a client's office without installing anything. WavePlan runs a full DAW-style timeline right in your browser — your studio workspace goes wherever you do.
-
Your Ideas Lab
This is where you zone in on creative decisions before the pressure of committing. Plan lyrical flows, sketch out edit ideas, annotate your meters, and explore what-if scenarios — all without touching your session. WavePlan is the space between hearing something and doing something about it.
-
A Multi-Tool for Audio
Dissect a reference track. Brick-wall test a mix. Jot notes on a frequency curve. Compare loudness between versions. WavePlan brings together the tools you keep reaching for — analyzing, annotating, referencing, and planning — into one workspace so nothing falls through the cracks between your ears and your DAW.
Introduction
Why Browser Based?
WavePlan runs in your browser so you’re never tied to one machine or a tangle of hard drives.
Open it on your laptop or your studio PC and instantly pull up your reference library, notes, task lists, and lyrics — without hunting for USBs, managing backup drives, or worrying about who has the “right” version. (Mobile support is coming down the line, too.) It’s just all your non-DAW work in one easy place, wherever you happen to be.
By running in the browser, you get:
-
Single-source reference library
Access your curated references, notes, and annotations from any device, anywhere. No manual syncing, no version confusion.
-
Seamless suite integration (coming soon)
Share timelines, exchange feedback, and collaborate with clients end-to-end without leaving the platform.
-
Zero-installation workflow
Get started instantly, keep your DAW session clean, and focus on planning rather than file management.
And just to be clear: you’re not giving up performance. You still get real-time playback, low-latency scrubbing, and full offline support when you need it. All without the install bloat.
Introduction
System Requirements
WavePlan is a desktop-first web application. It relies on modern browser APIs for real-time audio decoding, Web Audio playback, and high-resolution SVG waveform rendering. A desktop or laptop with a current browser is required for the full experience.
Supported Browsers
-
Google Chrome
Tested and supported. Chrome’s V8 engine and mature Web Audio implementation provide reliable performance for waveform rendering and playback.
-
Safari
Tested and supported. Safari on macOS uses hardware-accelerated audio decoding and Core Audio for low-latency playback. Ensure you’re running a recent version of macOS and Safari for the best experience.
-
Firefox
Tested and supported. Minor differences in rendering and composition visuals. Ensure you’re running a recent version of macOS and Safari for the best experience.
-
Other Chromium-based browsers
Edge, Arc, Brave, and Opera share Chrome’s rendering engine and are expected to work, though they haven’t been formally tested.
Desktop only: WavePlan is designed for desktop and laptop screens. It’s not intended for mobile or tablets. While pages may load on smaller devices, the waveform timeline, multi-track layout, and precision annotation tools require a pointing device and a display wide enough to work with comfortably.
Supported Hardware
- GPU acceleration
- WavePlan renders waveforms as high-resolution SVG paths that benefit from hardware-accelerated compositing. A dedicated or integrated GPU (standard on any modern Mac or PC) is recommended. Keep GPU acceleration enabled in your browser settings.
- Audio interface
- WavePlan works with any interface your OS recognizes. Playback routes through your browser’s default audio output. Just select your preferred interface in your OS sound settings; WavePlan will follow.
Getting Started
Quick Start
The fastest way to learn WavePlan is to start using it. Everything revolves around Plans; dedicated workspaces for each project as it moves through your studio. Create one Plan per session, client, or revision cycle to track tasks, compare versions, and capture decisions before you ever open your DAW.
To begin, create a new plan from the sidebar drawer. Each plan acts as a container for the audio tracks you want to compare, annotate, or organize together.
30-Second Quick Start
-
1
Click New Plan in the sidebar to create a workspace.
-
2
Name your plan by clicking the plan title in the Control Bar.
-
3
Upload WAV or MP3 files using Add Track
-
4
Click the track name above the waveform in the timeline to plug it in to the integrated player.
-
5
Click Play or press your space bar to begin playback.
-
6
Anywhere you see a colored circular plus sign + click it to record an annotation.
That's enough to get you moving. From here you can annotate, add more tracks, compare loudness, stress-test limiters, and map out your next DAW session. For a deeper look at how the interface is organized, see the Core Terminology and Interface sections below.
Getting Started
Core Terminology
Understanding these concepts will make the rest of the guide click faster.
What are Plans?
Plans are your project workspaces. Everything in WavePlan is organized around them. Each Plan holds its own tracks, annotations, task lists, and activity log. To create your first Plan, follow the Quick Start steps above.
What are Annotations?
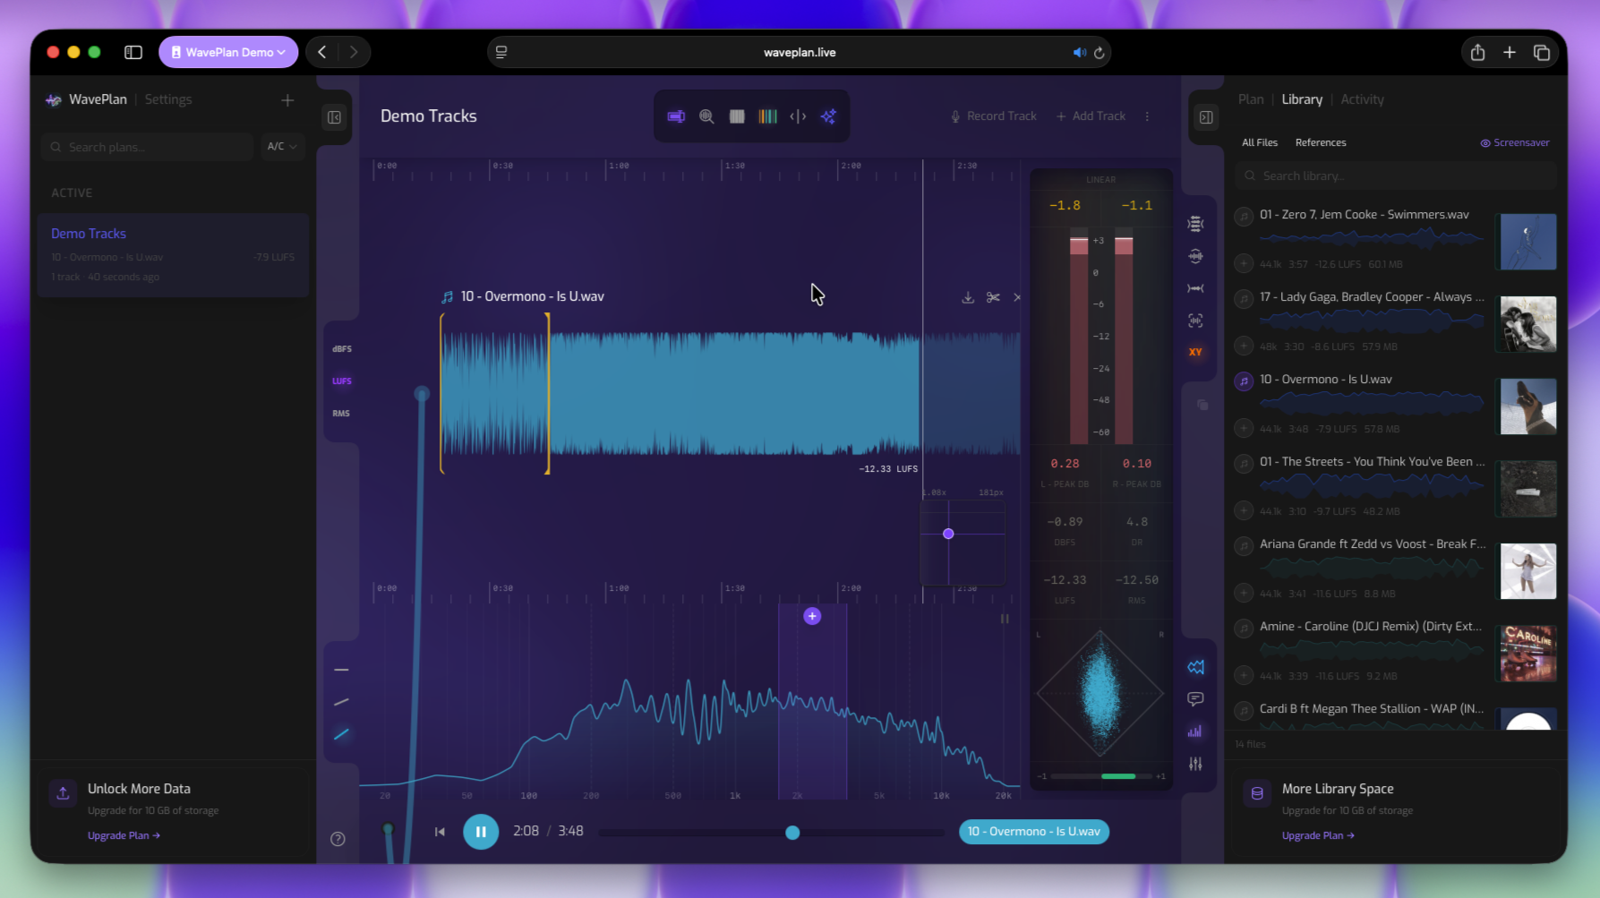
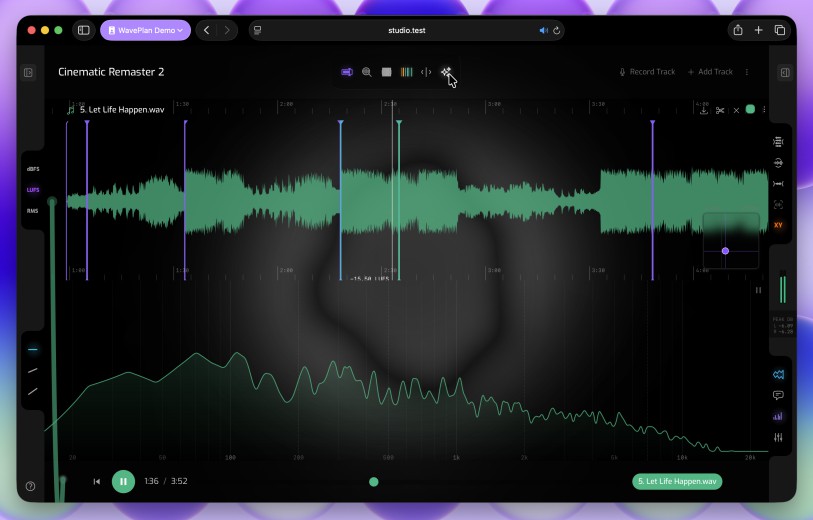
You can annotate directly on the waveform (arrangement markers, mixing notes, creative ideas), the frequency analyzer (EQ observations with frequency data), or the mixer (gain and limiter snapshots you can recall later). Every annotation carries a time position, a color, and a category—and all of them feed into the Emerging Ideas view and the Plan Sidebar task list.
Interface Regions
The app is split into five zones. You don’t need to memorize them now; just know where to look when the guide references them later. For a full breakdown of each region, see the Interface section.
Getting Started
Metering Verification
WavePlan calculates loudness metrics (Integrated LUFS, Short-term LUFS, RMS, Peak dBFS, and LRA) from decoded audio using standards-compliant algorithms.
If you want to verify that WavePlan’s readings match your trusted reference meters, you can route browser audio back into your DAW via loopback and compare values side-by-side.
Loopback Verification Method
The idea is simple: play a track in WavePlan, capture the browser’s audio output, route it into a DAW channel, and read a professional meter on that channel. The values should be comparable to loading the same file directly into the DAW.
-
1
Set up a loopback route
Configure your audio interface (or a virtual driver like BlackHole on macOS, VB-Cable/ASIO Link Pro on Windows) so the browser’s output routes to an input on your DAW. Check your device docs for internal routing steps.
-
2
Insert a reference meter
On the receiving DAW channel, load a trusted loudness meter (e.g., SSL Meter, Youlean, or any EBU R128 / ITU-R BS.1770–compliant plugin). Set it to Integrated LUFS for a full-file measurement.
-
3
Play the full track in WavePlan
Select the track, rewind to the start, and press Play. Let it run uninterrupted so the meter captures an integrated reading over the full program length.
-
4
Compare readings
After playback, compare the DAW meter’s Integrated LUFS value with WavePlan’s track metrics. They should match within a fraction of a LU. Minor differences (< 0.2 LU) can come from sample-rate conversion or dithering in the loopback path.
Direct file comparison. For the most accurate validation, also import the original file directly into a DAW track and run the same meter without loopback. This removes routing variables. WavePlan’s offline analysis should match the DAW to within rounding precision.