Interface
Overview
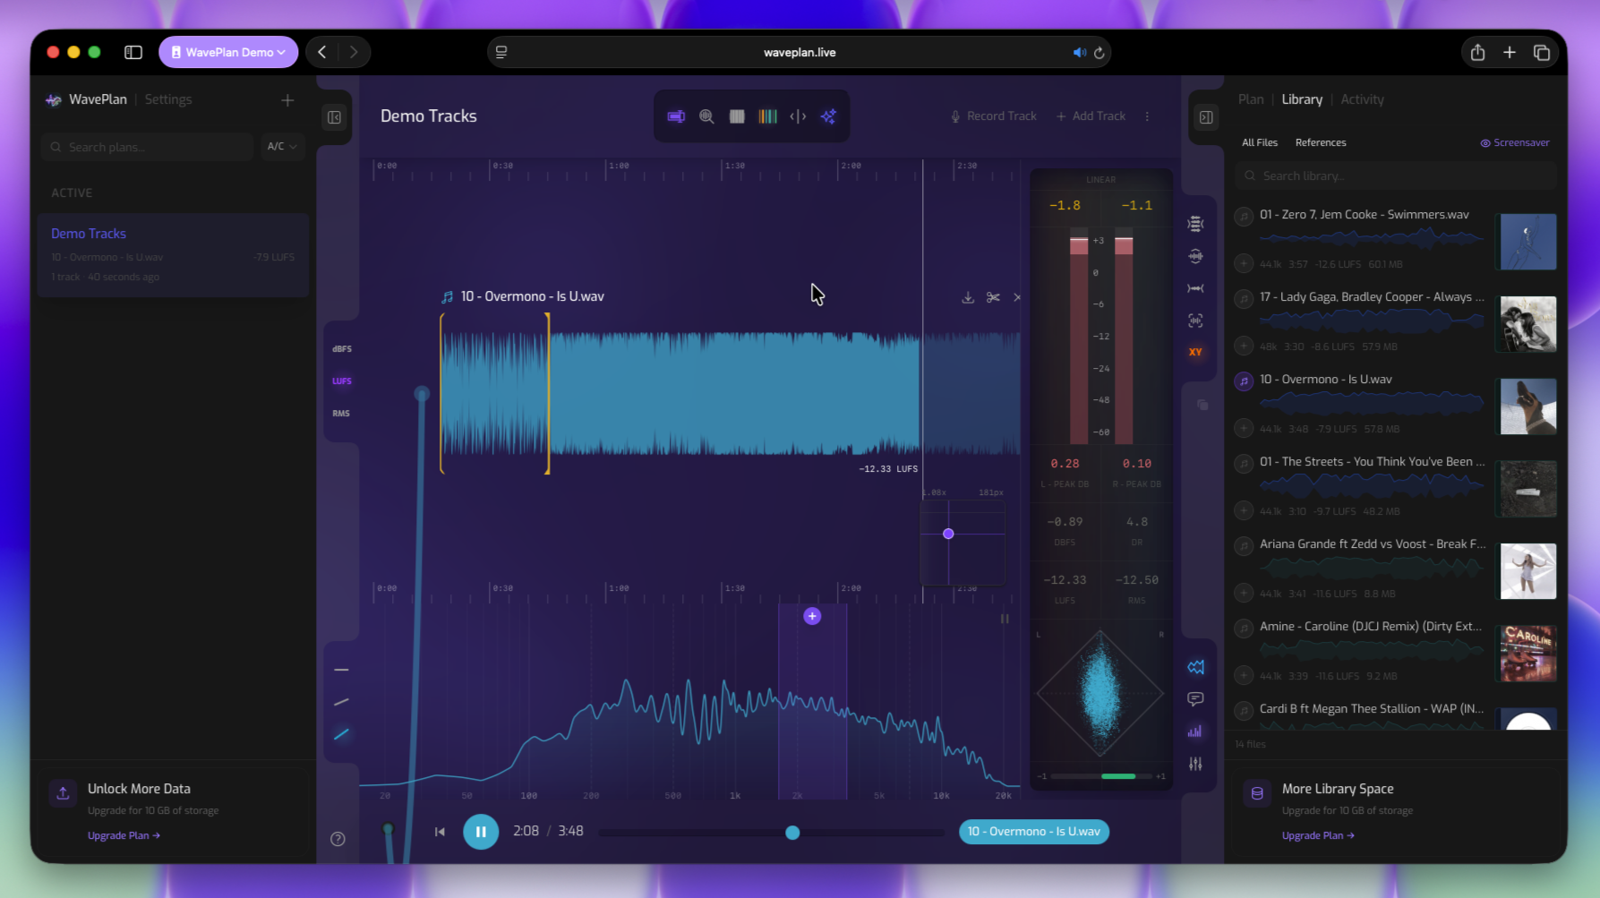
The WavePlan interface is organized into five distinct regions: the Folder Drawer, Control Bar, Main Workspace, Integrated Player, and Sidebar.
These zones are referenced throughout the documentation, so a quick orientation here will save you time later. Each region has a specific job, and most panels can be collapsed or expanded to maximize your working area.
- Folder Drawer The Folder Drawer is your main navigation hub. It slides open from the left edge and holds menus, filters, and app-level controls.
- Control Bar The Control Bar runs horizontally across the top of the Workspace. Its contents are context-specific, but in WavePlan it handles two main jobs: managing your current Plan and controlling how you interact with the timeline.
- Main Workspace The Main Workspace is the central area that fills the remaining screen space between the Control Bar, Sidebar, and Integrated Player. This is where all primary interaction happens.
- Integrated Player The Integrated Player is a transport bar that slides up from the bottom of the Workspace when a track is selected. It stays accessible as long as a Plan is active.
- Sidebar The Sidebar is the right-hand panel with tabbed views. It provides contextual information and controls for the active plan. Click the Library button in the Control Bar to open it directly to the Library tab.
Below, each region gets its own deep dive—full functionality, shortcuts, and how it actually works.
Interface
Folder Drawer
The Folder Drawer is your main navigation hub. It slides open from the left edge and holds menus, filters, and app-level controls.
-
Opening and Closing
Click the toggle on the left-hand side of the Control Bar to show or hide the Folder Drawer. When closed, the full screen is dedicated to your workspace. Toggling it never loses your place.
-
Context-Specific Content
The drawer’s contents change based on your active view. In WavePlan, it shows your plan list, a New Plan button, search, and status filters. In other app views, it displays relevant content for that context.
Opening & Closing the Folder Drawer
The Folder Drawer toggle sits at the left-hand end of the Control Bar. Click it once to open the drawer; click it again to close it. Your preference is saved — if you leave it open, it stays open across sessions.
-
1
Open
The Folder Drawer slides in from the left. Your plan list, search, and filters are immediately accessible without leaving the Workspace.
-
2
Closed
The Workspace expands to fill the freed space, giving you a wider canvas for detailed listening and annotation work.
Folder Drawer Header
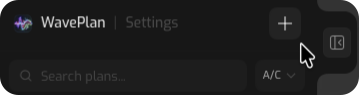
The WavePlan & Settings header works like a mini-menu. The WavePlan link always returns you to the main interface. The Settings link opens your management dashboard, where you can manage your profile, security, subscription, storage, and other account preferences.
Action Palette The primary creation button for your current view (e.g., New Plan). Under Settings view, the Logout link is displayed.
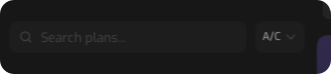
Search & Filter Quickly find plans by name or filter by status: Active, Completed, or Archived.
The List View A scrollable, paginated list of your Plans. Click any item to open it in the Workspace. Under Settings view, the List View holds your settings menu and account preferences.
Interface
Control Bar
The Control Bar runs horizontally across the top of the Workspace. Its contents are context-specific, but in WavePlan it handles two main jobs: managing your current Plan and controlling how you interact with the timeline.

- Folder Drawer Toggle The toggle button on the far left of the control bar opens or closes your Folder Drawer. WavePlan remembers your selection. When you close your Folder Drawer it stays closed until you need it again.
- Plan Title You can call your plan whatever you like. Click the title to switch to edit mode.
- Tool Palette Tool toggles for the workspace: Selection Tool, Loupe, Auto-Cue, Cue Overlays, Cue Markers, and Follow Playhead. Each button highlights in its accent color when active. See Plan Controls Toolbar for full details.
- Record & Add Tracks Click the Add Track button to upload an audio file to your plan. The Record Track button allows you to record voice memos and audio notes straight to your Plan. (Not intended for studio recording)
- Context ⋮ Menu Set your plan's Status, reset your Listening Cache, or Delete your Plan.
- Sidebar Toggles The toggle button on the far left of the control bar opens or closes your Sidebar. WavePlan remembers this selection too, but your Sidebar always opens to the Plan view.
Interface
Integrated Player
The Integrated Player is a transport bar with integrated A/B track comparison.
The player surfaces from the bottom of the workspace when a track or other audio source is armed for playback and stays visible as long as the audio source is active.

- Help Button Loads this documentation in a fresh browser tab/window.
Transport Controls
- Source Link The source link cable tethers to the selected audio source. Clicking, or pulling the jack will deselect the audio source.
- Rewind to Start Returns the playhead to the beginning of the track.
- Play / Pause Themed by the active track’s color. Click to toggle playback, or press Spacebar to toggle between play and pause.
- Time Display Shows the current position and total duration in MM:SS / MM:SS.
- Scrubber Horizontal slider for seeking. Drag the track themed thumb or click anywhere on the bar to jump to a position.
Track Indicators & Comparison
The player displays colored pills indicating which tracks are loaded. The active track’s pill is highlighted violet. Click any pill to switch the audible track.
- Standard Mode
- One pill per selected track. The active pill is violet; inactive pills are zinc. Click a pill to switch tracks mid-playback.
- A/B Comparison Mode
- Two pills appear: REF (rose) and TARGET (blue). Click either pill to toggle between the reference and target tracks. A secondary control offers two toggle behaviours: CONT (continue from current position) or RST (restart from the original play position).
- Solo Mode
- A single violet pill showing the soloed track’s name. Activated by previewing a track from the Library sidebar.

Interface
Sidebars
WavePlan's right-hand collapsible Sidebar panel provides access to contextual information and controls for the active plan.
Switch views by clicking the Plan, Library or Activity tab at the top of the Sidebar.
Sidebar Views
-
Planning Sidebar
Provides an actionable task for each annotation in your project giving you a clear process to be completed in DAW. See Planning Sidebar.
-
Music Library Sidebar
Browse, search, preview, and upload to your WavePlan Music Library. Contains all of your audio files (not just from the selected plan). See Music Library Sidebar.
-
Activity Tracking Sidebar
A chronological feed of everything that has happened in the plan — uploads, version changes, annotations, and more. See Activity Tracking Sidebar.
- Default Sidebar View
Sidebar will always opens to the Plan tab. Even if the Music Library Sidebar was displayed prior to closing, re-opening the sidebar will show the Planning Sidebar by design.
Opening & Closing the Sidebar
The Sidebar toggle sits at the top of the Layout Bar, adjacent to the right edge of the Control Bar. Click it once to open the Sidebar; click it again to close it. WavePlan remembers your choice — if you leave it open, it stays open across sessions.
-
1
Open
The Sidebar slides in from the right. Your layout preference is saved and persists across sessions.
-
2
Closed
The Workspace expands to fill the freed space, giving the Timeline and Analyzer more horizontal room.
- Dashboard view
On the Dashboard, the Sidebar toggle is still present but Timeline and component controls in the Layout Bar are hidden — there is no active plan to work with.
Interface
Workspace
The Workspace is the central area that fills the remaining screen space between the Control Bar, Sidebar, and Integrated Player. This is where all primary interaction happens.
The Workspace is home to the WavePlan Timeline, a scrollable and scalable multi-track setting for the waveforms you wish to annotate. In addition to the Timeline, the WavePlan workspace hosts additional, optionally visible components:
Components
-
Timeline ‐ Scrollable and scalable multi-track setting for the waveforms you wish to annotate.
-
Frequency Analyzer ‐ Annotatable real-time spectrum analysis
-
Mixer ‐ Annotatable real-time gain staging, A/B comparisons and brickwall limiter on every mixer track.
-
Emerging Ideas ‐ A visual multi-tool for reviewing annotations, lyrics annotations and jog navigation.
-
Meter ‐ Annotatable Stereo metering with goniometer
Mode Bar
Layout Bar
Everything you interact with during a session — playback, zooming, annotating, selections — happens in the Workspace. The Layout Bar, which divides the Workspace and the Sidebar, hosts the Focus & Zoom tools
Workspace
Mode Bar
Workspace components reveal their context-sensitive display modes within the Mode Bar — the left-side control strip — within the WavePlan workspace. The Mode Bar offers immediate control over measurement units, analysis curves and context-specific behaviours that tailor the workspace to your needs.
The Mode Bar control-strip is visually organised into notched segments that are revealed or hidden with each workspace component. Upon selection, the active mode is illuminated, and accented by a subtle glow. Activating a mode instantly switches the component to the activated mode and your selection is remembered until you switch modes again.
Timeline — Loudness Units
The Timeline notch gives you the ability to switch between three loudness measurement modes. This modifies the active unit displayed next to the playhead and the selection tool's loudness and dynamic range measurement units.
- dBFS
- Decibels relative to full scale. A raw peak measurement where 0 dBFS is the absolute digital ceiling. Use this when monitoring headroom, catching clipping, or validating technical delivery specs.
- LUFS
- Loudness Units relative to Full Scale. A perceptual measurement aligned to ITU-R BS.1770, designed to match how humans actually hear loudness. The standard for streaming normalization. This is the default mode.
- RMS
- Root Mean Square. An average power measurement that gives a sense of overall signal energy. Higher RMS values indicate a louder, more compressed signal.
- Playback-Safe Switching
Tap any loudness button to change units instantly. The playhead label updates in real time without interrupting playback.
Analyzer — Spectrum Slope & Hold
The Analyzer notch provides control over the frequency spectrum visual tilt modes.
Flat spectrum. No tilt is applied. Use this when you want to see the raw FFT output exactly as the audio engine delivers it.
Mild slope tilt. A gentle compensation that works well for pop, electronic, and other full-range productions.
Steep slope tilt. Stronger compensation for acoustic and classical material where low-end energy is naturally pronounced.
Hold
-
Hold On
When Hold is activated, the spectrum curve freezes at the moment playback pauses. The frozen curve remains visible, giving you the ability to inspect transient peaks and decay shapes without the display clearing.
-
Hold Off
When Hold is off, the spectrum curve clears when playback pauses, returning to a neutral state.
- Shared state
The Hold mode is shared between the Analyzer and the Emerging Ideas component. Activating it from either notch updates the same global setting.
Emerging Ideas — Lock, Scale & Hold
The Emerging Ideas notch offers three behavioural controls that shape how you interact with the component during a session.
-
Lock (Lyric Edit Mode)
When unlocked, the Emerging Ideas component enters Lyric Edit Mode — annotations become interactive, allowing you to reposition, edit and retime lyrics and cue labels. When locked, the component returns to its default playback-following view and annotations are protected from accidental movement.
-
X-Scale
The vertical slider controls the horizontal time viewport zoom of the Emerging Ideas component. It is only visible when the component is unlocked (Lyric Edit Mode). Drag upward to zoom in, expanding the time axis for fine annotation work; drag downward to zoom out for a wider arrangement view. The scale is saved per-track.
-
Hold
When Hold is activated, the Emerging Ideas component freezes at the moment playback pauses, keeping the current arrangement of annotations visible for reference. When Hold is off, the component returns to a neutral state on pause.
- Shared Hold state
The Hold mode is shared between the Emerging Ideas and the Analyzer component. Activating it from either notch updates the same global setting.
Mixer — Limiter Link
The Mixer notch offers a Limiter behavioural mode, allowing for the linking of all engaged limiters' ceiling, release and gain threshold.
-
Linked
All limiter settings are synchronized across tracks. Changing the ceiling on one strip updates every strip. The Link button glows amber.
-
Unlinked
Each track's limiter operates independently. Use this when you need different ceiling or release values per stem.
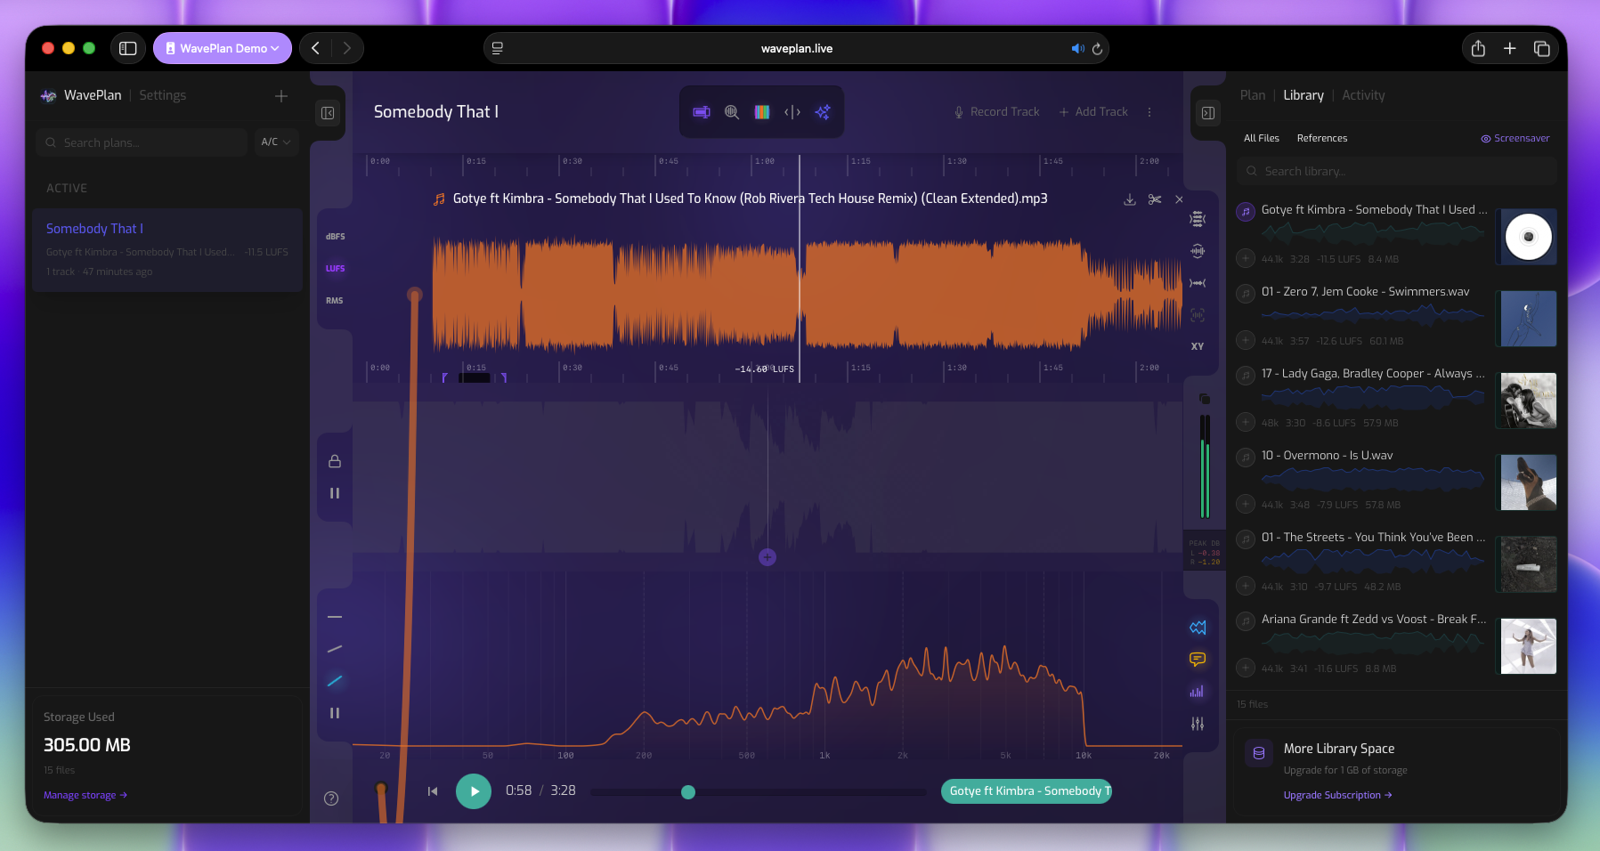
Workspace
Layout Bar
The Layout Bar is the control strip docked to the right edge of the workspace. It hosts the component visibility toggles, zoom and focus shortcuts, and a compact stereo meter.
The bottom notch is where you'll spend most of your time — it's where you open the Mixer, bring up Emerging Ideas, and toggle every other Workspace component on or off. If something isn't visible in your Workspace, this is the first place to look.
Component Toggles
The bottom notch of the Layout Bar lets you show or hide each Workspace component. Every toggle has a unique color that glows when the component is active, making it easy to read the layout state at a glance.
The primary waveform canvas. Disabling this collapses the Timeline entirely, leaving more vertical space for the Analyzer and Mixer.
The lyrical and annotation overlay view. Toggle this off when you need an unobstructed look at the underlying waveforms.
The real-time frequency spectrum analyzer with EQ annotation support. Essential for spectral decision-making and frequency-based note-taking.
The gain staging and limiter panel. Toggle this off when you're in a listening-only phase and don't need faders or metering strips.
- Grid layouts
When the Workspace is in Grid mode, components rearrange into a tiled layout. The component toggles still work exactly the same way—they simply remove or restore a tile from the grid.
Compact Meter & Metering Component
The central notch of the Layout Bar hosts the Compact Meter — a pair of peak bars that stay visible at all times — and the toggle that expands them into the full Metering Component.
-
Compact Meter
Two bars (Left and Right) show instantaneous peak levels at all times. Color coding follows standard thresholds: emerald below -6 dB, amber between -6 and -1 dB, and red above -1 dB.
-
Peak Hold Readout
Below the bars, a numeric display shows the highest peak observed since the last reset. Click it to reset both channels simultaneously.
-
Expand Metering Component
Click the toggle above the Compact Meter to open the full Metering Component in the Workspace. This reveals detailed loudness history, true-peak readouts, and additional metering graphs. The Compact Meter collapses while the Metering Component is open, and reappears when it's closed.
Timeline Layout Controls
The top notch of the Layout Bar holds a cluster of five buttons for Timeline zoom and focus. These are only active when the Timeline component is visible.
Fits the entire plan into the viewport. Every track is visible at once, making this ideal for structural review or client walkthroughs.
Cycles through calibrated zoom states. Each click advances to the next preset: overview, balanced, detailed, and sample-level inspection scales.
Zooms horizontally so the selected track's full duration fits the viewport. Track height remains unchanged. Disabled when no track is selected.
Zooms and scrolls to frame the current selection perfectly. Disabled when no time selection is active on the waveform.
Track Size Presets
1.0x / 60px
Overview scale. Every track is compact and the full arrangement is visible at a glance. Best for structural review.
6.0x / 120px
Balanced view. A comfortable scale for annotation work — enough detail to read waveform shape without losing context.
12.0x / 185px
Detailed editing scale. Transients and dynamics become clearly visible. Ideal for fine annotation placement and comparison.
32.0x / 375px
Sample-level inspection. Maximum horizontal zoom with tall tracks. Use this for precise edits or catching micro-level artefacts.
The XY Scale Controller toggle sits at the bottom of the Timeline layout cluster. When active, a draggable Zoom Pad appears in the bottom-right corner of the Timeline. The toggle glows orange while the pad is open.
XY Scale Controller
Timeline Scale
Dragging horizontally controls the timeline scale in pixels per second, on a logarithmic curve from 0.2x to 32.0x. Small movements at the low end give broad structural control; the upper range unlocks sample-level detail.
Track Height
Dragging vertically controls the height of every track in pixels, on a linear scale from 48px to 384px. Taller tracks give more room to read waveform detail and place annotations precisely.
- Zoom Pad reset
Double-click the violet handle inside the XY Zoom Pad to reset to defaults: 1.0x scale and 96px track height.
Folder Drawer
Plans
A Plan is your dedicated workspace for a piece of work — a place to load audio, capture decisions, and build a clear roadmap before you open your DAW.
Each Plan keeps its tracks, annotations, and measurements together in one place. Whether you're comparing mix revisions, aligning a reference, or mapping out a mastering chain, everything stays tied to that Plan so nothing gets lost between sessions.
What's in the Folder Drawer
Open the Folder Drawer from the left end of the Control Bar to browse and manage your plans. From top to bottom it gives you:
-
New Plan button
Creates a plan immediately and loads it into the Workspace. Give it a name from the Control Bar and start adding tracks.
-
Search
Type to filter the list by plan name in real time. Search reaches across all statuses, so you can find an archived plan without changing your filter first.
-
Status filter
Toggle which status groups are visible — Active, Complete, and Archived. Active and Complete are shown by default; Archived is hidden until you enable it.
-
Plan list
A scrollable list of your plans grouped by status. Each item shows the plan name, its tracks with LUFS readings where available, and a track count with last-updated time. Click any plan to load it into the Workspace.
Working with Plans
Create a New Plan
-
1
Click the New Plan button in the drawer header.
-
2
The plan is created immediately and loaded into the Workspace with no name and no tracks.
-
3
Click the plan name in the Control Bar to give it a title.
-
4
Upload or record your first track to begin working.
Open an Existing Plan
-
1
Open the Folder Drawer from the left end of the Control Bar.
-
2
Click any plan in the list.
-
3
WavePlan loads the plan into the Workspace and restores its tracks on the Timeline.
-
4
The browser URL updates to the plan's direct link — bookmark it or share it to return straight to this plan.
Find a Plan
-
1
Type into the Search field to filter the list by plan name in real time.
-
2
Use the status filter dropdown to limit the list to Active, Complete, or Archived plans — or any combination.
-
3
Search always reaches across all statuses, so you can find a plan by name without adjusting the filter first.
Access Archived Plans
Archived plans are hidden by default. There are two ways to find them:
-
1
Open the status filter dropdown and enable the Archived option — archived plans appear in the list alongside your other plans.
-
2
Or type the plan name into the Search field — results include archived plans regardless of the current filter state.
Control Bar
Plans
Naming your plan, managing its tracks, and controlling its lifecycle are all within reach from the Control Bar.
These actions are specific to the plan you have open — renaming, status changes, uploading tracks, and deletion all live here.
Plan Controls at a Glance
-
Plan Name
The plan title displayed on the left of the Control Bar. Click it to rename the plan inline.
-
Add Track
Opens a file picker to upload a new track, or lets you add an existing file from your Library without re-uploading.
-
Plan Actions Menu
The ⋮ button on the right. Opens a dropdown containing status controls, cache management, and the delete action.
Plan Actions
Rename a Plan
-
1
Click the plan name in the Control Bar.
-
2
The heading becomes an editable field with the current name pre-selected — just start typing to replace it.
-
3
Press Enter or click Save to confirm. Press Escape or click Cancel to discard.
-
4
The URL updates automatically to match the new name — any bookmarks or shared links will need refreshing.
- Empty names are rejected
If you clear the field and try to save, WavePlan keeps the original name. A plan must always have a title.
Upload a Track
-
1
Click Add Track in the Control Bar.
-
2
A file picker opens — select a .wav or .mp3 file.
-
3
Upload begins immediately. A progress indicator appears near the button while the file transfers.
-
4
Once complete, the track appears on the Timeline and the waveform decodes in the background.
Add a Track from your Library
-
1
Open the Music Library Sidebar from the Layout Bar.
-
2
Find the file you want and click to add it to the current plan.
-
3
The track is added without re-uploading — it references the file already in your Library.
Set Plan Status
-
1
Click the ⋮ plan actions menu in the Control Bar.
-
2
Choose Active, Complete, or Archive from the list.
-
3
The plan moves to the corresponding group in the Folder Drawer immediately.
- Non-destructive
Status changes are always reversible — you can switch between any status at any time without losing any data.
Archive a Plan
Archiving moves a plan out of your active list without deleting anything. All tracks, annotations, and activity history are fully preserved.
-
1
Click the ⋮ plan actions menu.
-
2
Select Archive. The plan moves to the Archived group, which is hidden in the Folder Drawer by default.
-
3
To restore it, find it via search or the Archived filter, open it, and change its status back to Active or Complete.
Clear Cached Listening
Use this if you notice stale waveform visualisation or want to force a fresh decode. It only affects local browser cache — your plan data, tracks, and annotations are untouched.
-
1
Click the ⋮ plan actions menu.
-
2
Click Clear Cached Listening.
-
3
WavePlan clears the local spectrum analysis cache. The next time you play a track it will decode fresh.
Delete a Plan
Deletion is permanent and cannot be undone. Consider archiving instead if there's any chance you'll need the plan later.
-
1
Click the ⋮ plan actions menu.
-
2
Click Delete Plan (shown in red).
-
3
Confirm the dialog. The plan, its tracks, and any audio files not shared with other plans are permanently removed.
Control Bar
Timeline
A set of tools in the Control Bar shapes how you see and interact with the Timeline — without changing any of your plan data.
Use these to make selections, magnify waveform detail, control what annotations are visible, and keep the playhead in view during playback.
Timeline Tools at a Glance
-
Selection Tool
Click and drag on a waveform to create a colored region. Choose from a palette of colors — or None to disable selections entirely. Active by default.
-
Loupe
A circular magnification overlay on the active track. Follows the playhead during playback and your cursor when paused. Mutually exclusive with Auto-Cue.
-
Auto-Cue
Automatically surfaces annotations as the playhead reaches their position during playback. Works across all annotation types. Mutually exclusive with Loupe.
-
Annotation Visibility
Controls which annotation types appear on the Timeline as overlays and markers. See Workspace Controls for a full description of all annotation types and their per-component behaviour.
-
Follow Playhead
Keeps the Timeline scrolled to the playhead during playback. A scroll leash lets you look around nearby without losing your place.
Using the Timeline Tools
Make a Selection
-
1
Click the Selection Tool icon in the Control Bar to open the color picker.
-
2
Choose a color from the palette. The button updates to show your chosen color.
-
3
Click and drag on any waveform to draw a colored region.
-
4
To stop making selections, open the picker and choose None.
Use the Loupe
-
1
Click the Loupe icon in the Control Bar to enable it.
-
2
A circular magnified view appears on the active track, showing fine waveform detail without affecting your zoom level.
-
3
During playback the Loupe tracks the playhead. When paused, it follows your cursor.
-
4
Click the icon again to dismiss it.
- Loupe and Auto-Cue are mutually exclusive
Enabling one automatically disables the other.
Use Auto-Cue
-
1
Click the Auto-Cue icon in the Control Bar.
-
2
Start playback. Annotations appear automatically as the playhead reaches their position — no manual scanning needed.
-
3
Click the icon again to turn it off.
Follow the Playhead During Playback
-
1
Click the Follow Playhead icon in the Control Bar.
-
2
Start playback. The Timeline scrolls automatically to keep the playhead visible.
-
3
You can still scroll manually to look around — the scroll leash will bring you back if you drift too far.
-
4
Click the icon again to scroll freely during playback.
Control Bar
Workspace
Some controls in the Control Bar apply across the whole workspace, regardless of which component is active.
The annotation visibility filter, background visualizer, and recording controls all live here — affecting your environment rather than any one component.
Workspace Controls at a Glance
-
Annotation Filter
A unified dropdown that controls annotation visibility across all workspace components simultaneously. Filter by annotation type and choose whether overlays, markers, or both are shown.
-
Background Visualizer
Toggles the ambient audio-reactive background that responds to playback. Turn it off for a cleaner, distraction-free workspace.
-
Record Track
Captures audio directly from your microphone and adds it as a new track on the current plan. The recording appears on the Timeline in real time.
Annotation Filter
The annotation filter is a single dropdown in the Control Bar that governs what annotation content is visible across the entire workspace. Every component that can display annotations — the Timeline, Frequency Analyzer, Mixer, and Emerging Ideas — responds to this filter simultaneously.
Overlays vs Markers
Each annotation type can be shown in two distinct visual forms, controlled by independent checkboxes in the filter dropdown:
-
Overlays
Colored regions painted onto the waveform background to show the extent of an annotation — useful for seeing arrangement sections, frequency ranges, or time-bounded notes at a glance.
-
Markers
Thin vertical lines drawn at exact annotation timestamps to pinpoint moments in time — useful when you want precise reference points without filling the waveform with color.
- Mix and match
Overlays and Markers are independent — you can show both, either, or neither for each annotation type. A common setup is to show Overlays for arrangement structure and Markers for everything else.
Annotation Types
The filter dropdown has one row per annotation type. Each type has its own color and is created from a specific part of the workspace:
Annotations created in the Frequency Analyzer. Carry EQ-specific metadata including frequency range and EQ type.
Annotations created from the Metering Component and Goniometer. Capture loudness or stereo-field observations at a specific moment.
Annotations created from the Mixer panel. Tied to gain staging decisions or balance observations for a specific track.
Lyric and vocal annotations created in the Emerging Ideas component. Tied to a time position and optionally a specific line of text.
Structural section markers created directly on the waveform — intros, verses, choruses, bridges, outros. Overlay mode is especially useful here for an at-a-glance arrangement map.
General-purpose waveform annotations that don't fit a specific structural category — notes, feedback, custom observations placed directly on the track.
Annotations brought in from an external source, such as a DAW session or a collaborator's export. Treated as a first-class annotation type with the same visibility controls as any other.
How the Filter Affects Each Component
Toggling a type or display mode in the filter applies everywhere at once, but what you actually see differs by component:
-
Timeline
Overlays paint colored regions onto the waveform background. Markers draw thin vertical lines at each annotation's timestamp. Both are visible on all tracks that carry annotations of the selected type.
-
Frequency Analyzer
Analyzer-type annotations appear as ellipse dots and connecting lines across the spectrum, with EQ glyph icons along the line. Other annotation types appear as vertical frequency markers where applicable.
-
Mixer
Mixer-type annotations surface as indicators on the relevant track strip, associating the note with the gain staging context in which it was made.
-
Emerging Ideas
Lyrics annotations appear inline with the lyric text view. Other annotation types surface as time-stamped entries in the overlay layer.
Using the Workspace Controls
Filter Annotation Visibility
-
1
Click the Annotation Filter button in the Control Bar to open the dropdown.
-
2
Each row shows an annotation type with its color dot, and two checkboxes — Overlays and Markers.
-
3
Toggle any checkbox to immediately show or hide that display mode for that type across all components.
Toggle the Background Visualizer
-
1
Click the Background Visualizer toggle in the Control Bar.
-
2
The ambient audio-reactive background turns on or off. Your preference is remembered across sessions.
Record a Track
-
1
Click the Record Track button in the Control Bar.
-
2
If prompted, allow microphone access in your browser.
-
3
Recording begins immediately. A live waveform appears on the Timeline showing the incoming audio in real time.
-
4
Click the button again to stop. The recording is uploaded and added to your plan as a new track.
- Maximum recording length
Recordings are capped at 10 minutes. WavePlan will stop and save automatically if you reach the limit.